Next.js Configuration
Creating the Next.js project
For the Next.js project configuration, the documentation makes use of the official blog starter kit.
If you want to start by creating a new blog, you can use the following command:
npx create-next-app --example blog-starter <your-project-name>InfoIn case you already have a Next.js project, you can follow the steps below to configure Front Matter CMS.
Installing Front Matter
You can get the extension from the Visual Studio Code Marketplace - Front Matter or by clicking on the following link: open Front Matter CMS extension in VS Code.
Initializing Front Matter
Once Front Matter CMS is installed, you will get a new icon in the Activity Bar. When you click on it, it will open the Front Matter CMS panel in the primary sidebar. Follow the next steps to initialize your project:
- Click on the Initialize project button in the Front Matter panel
- The welcome screen will open, and you can start initializing the project
- Click on the first step to Initialize project
- As Next.js is one of the supported frameworks, it will be selected by default
- Register the content folder by clicking on the
_postsfolder- Front Matter will ask you for the collection name, which can be renamed to
posts
- Front Matter will ask you for the collection name, which can be renamed to
- If you have articles with tags and/or categories, you can click on the import action
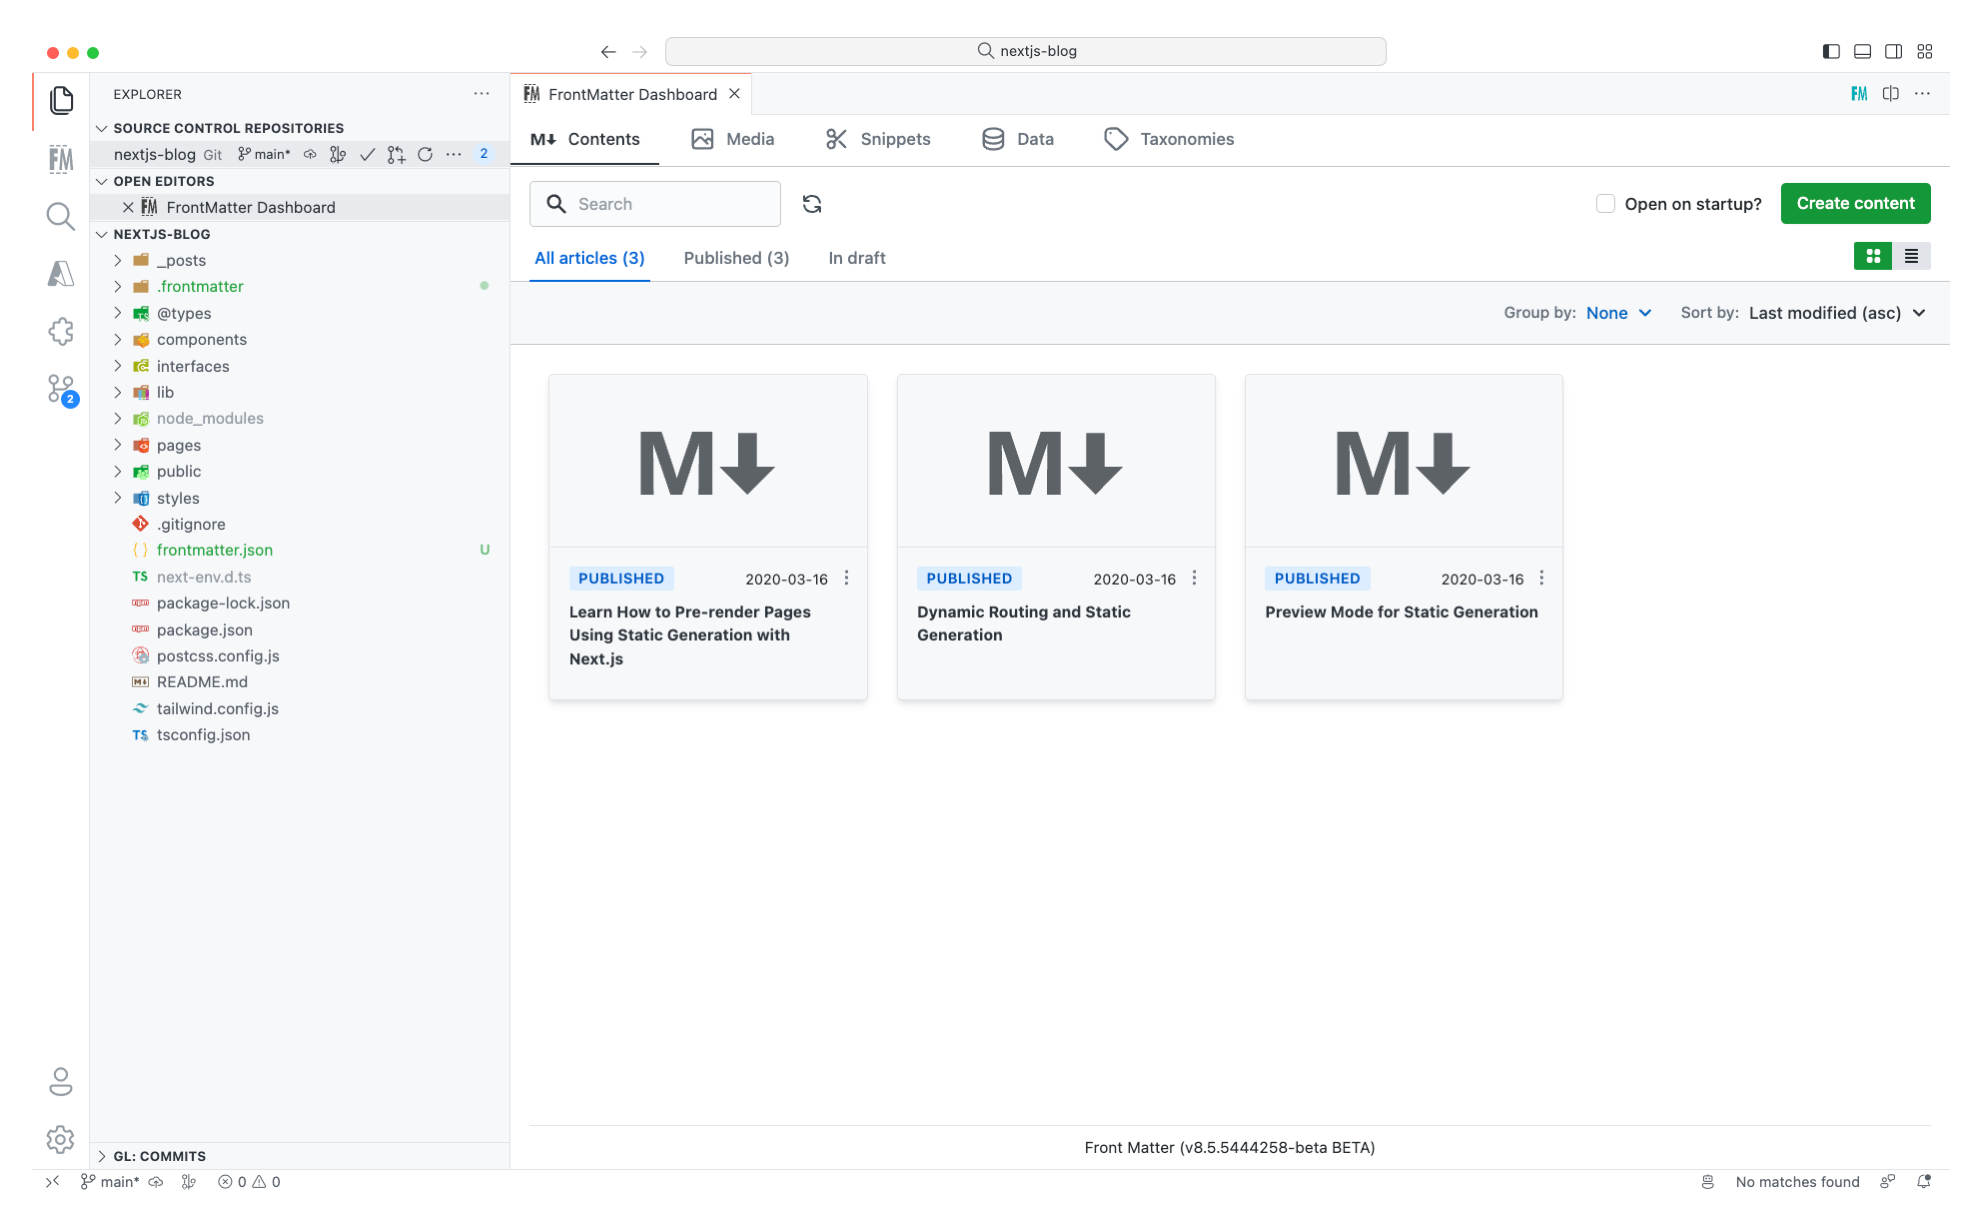
- Once the initialization is completed, you can click on the Open Dashboard button to open the dashboard
Project configuration
Once the project is initialized, you will get a frontmatter.json configuration file
and a .frontmatter folder in the root of your project.
| _posts/
| .frontmatter/
| - database
| -- taxonomyDb.json
| ...
| frontmatter.json
| package.json
Content-type configuration
ImportantThe following steps are only required if you want to use the blog starter kit is structure and metadata. If you want to use your own structure, you can skip this step or configure it to your needs.
Start by opening one of the markdown files shown on the dashboard. Once opened, you can see the SEO status, actions, and metadata of the content.
In the metadata section, you will notice that the content type has some missing fields. Follow the next steps to fix this:
- Click on the create content-type button
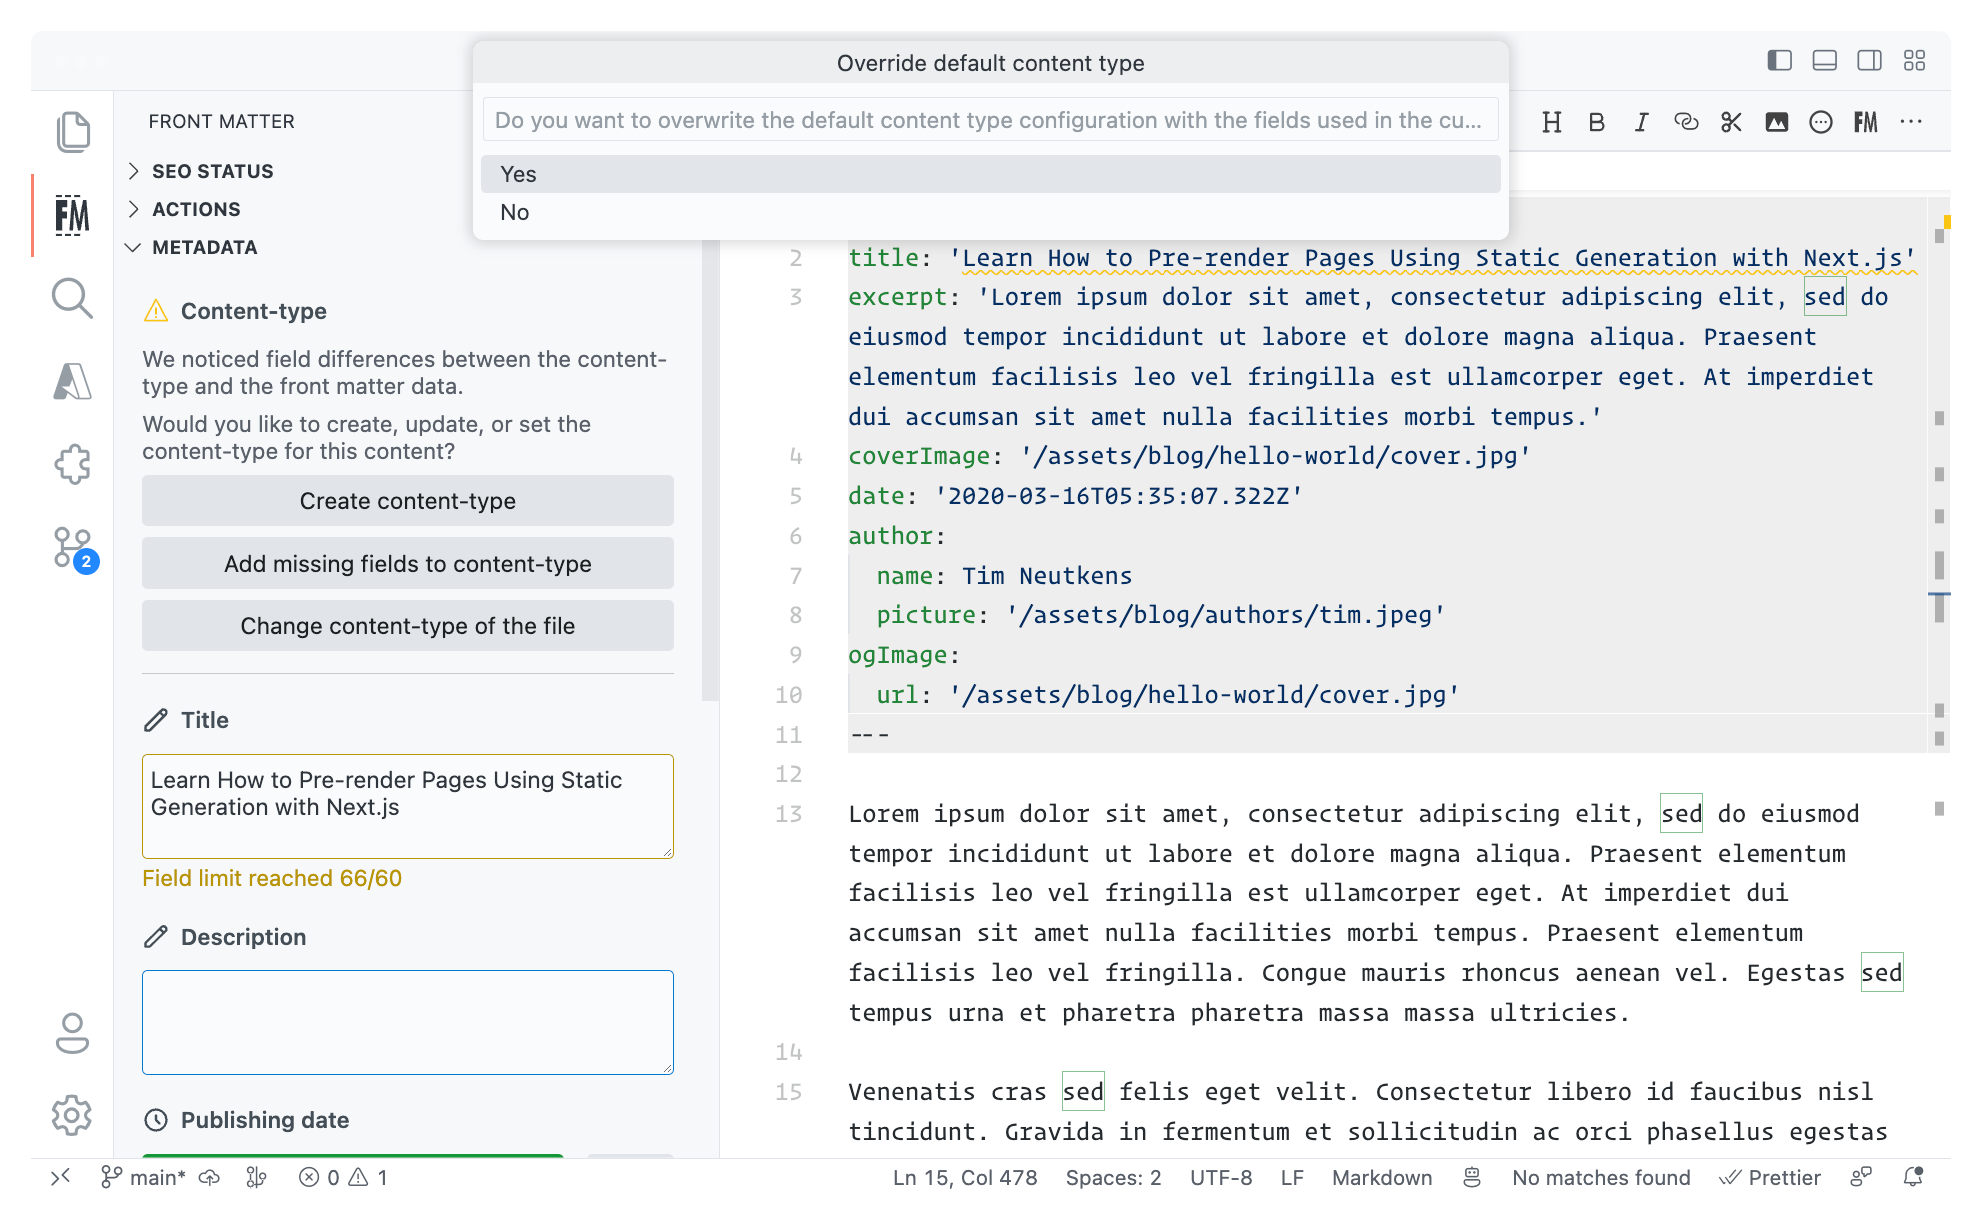
- Select yes to overwrite the existing content-type. Once completed, you can see an update to the metadata section.

- Sometimes, more configuration might be required. In that case, you can manually open the
frontmatter.jsonfile and update the configuration. Which we will do for the image field in theauthorandogImagefields. - In the
frontmatter.jsonfile, you can find thefrontMatter.taxonomy.contentTypes, which has a default content-type configured with the fields of the blog starter kit. - Add the
isPreviewImageproperty to thecoverImagefield and set its value totrue - Update the
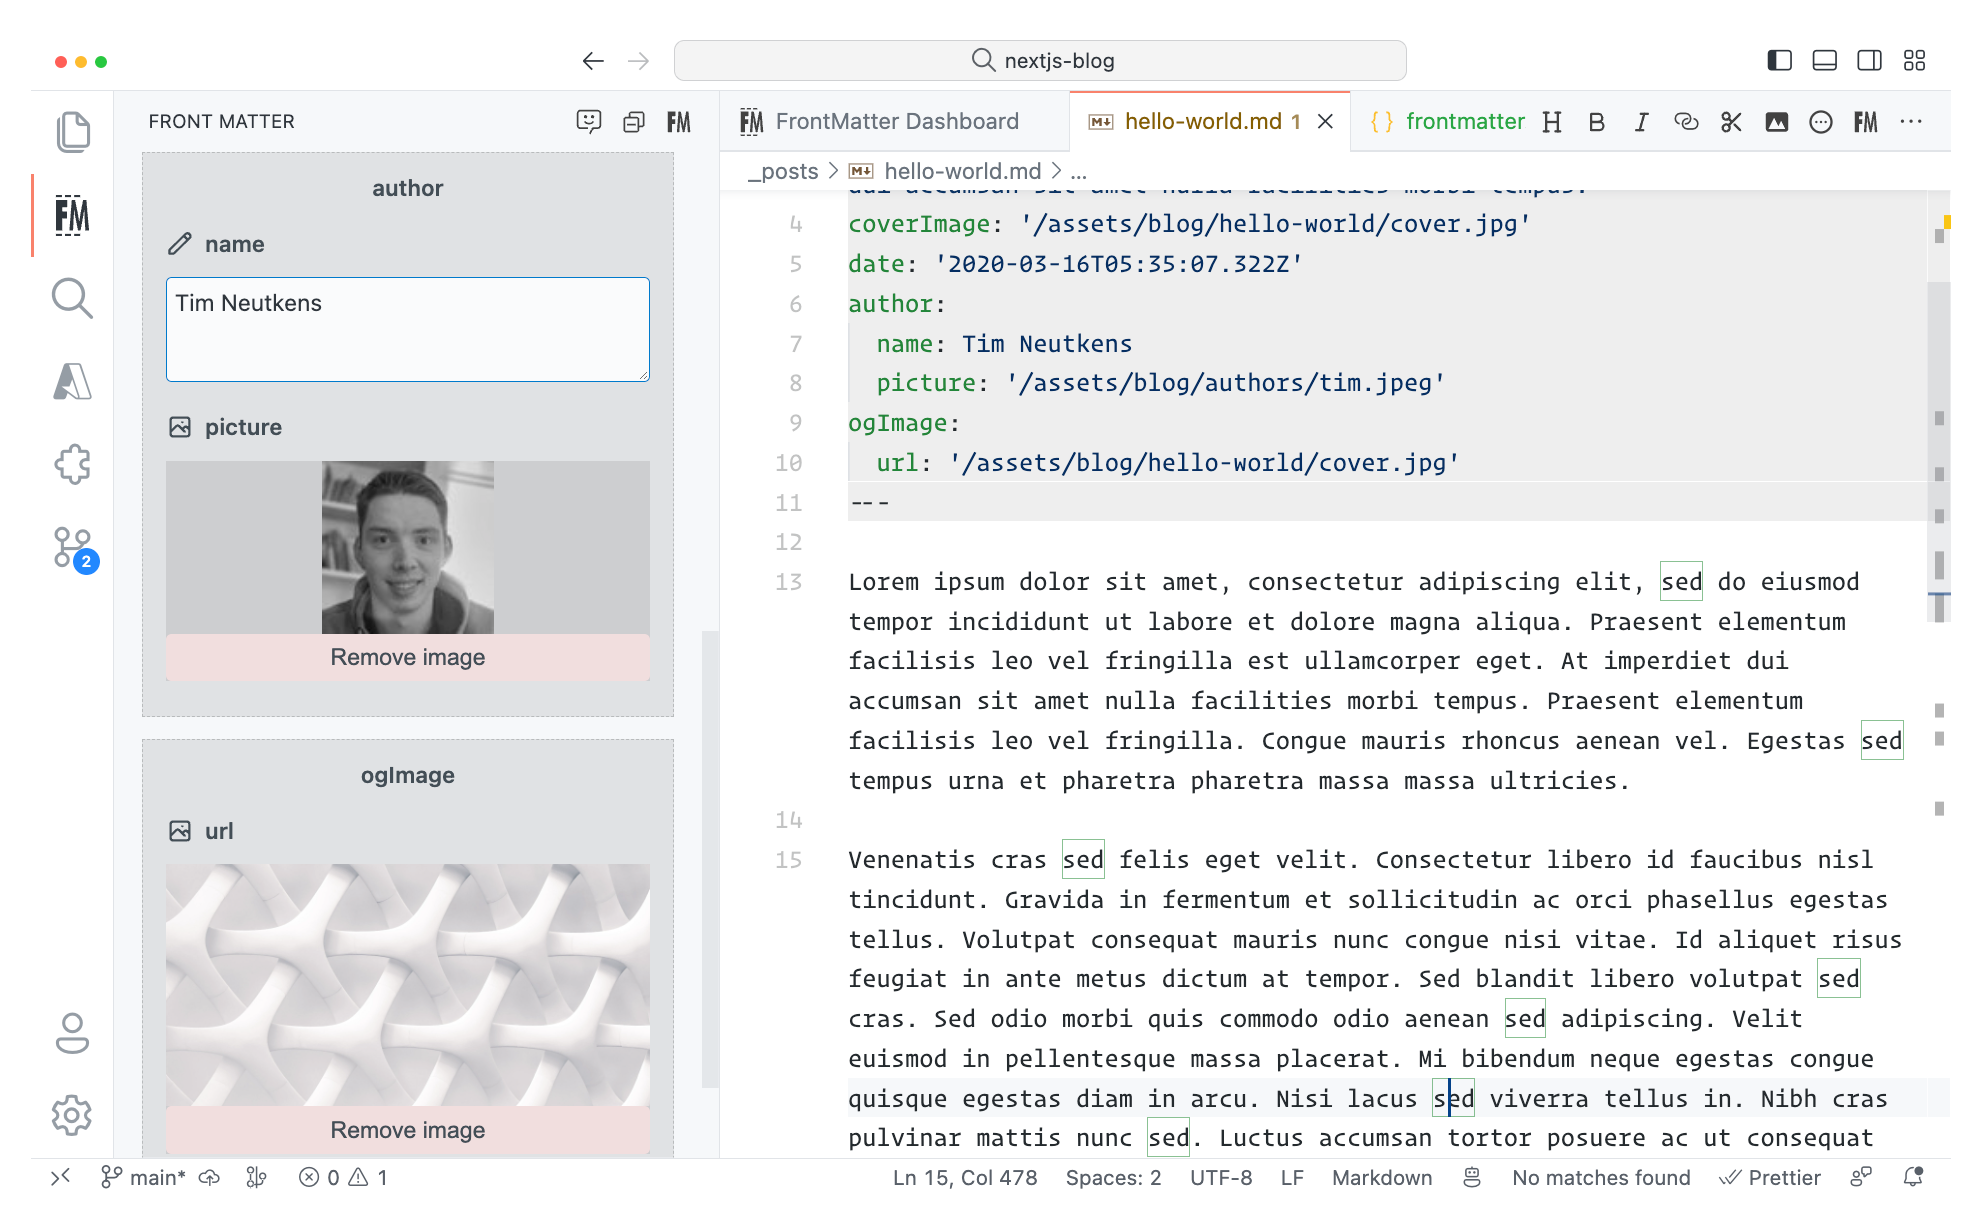
picturefield of theauthorfromstringtoimage - Update the
ogImagefield fromstringtoimage
Once you have updated the configuration, you can go back to the markdown file and see the changes in the metadata section.
Here you can see the updated configuration:
{
  "frontMatter.taxonomy.contentTypes": [
    {
      "name": "default",
      "pageBundle": false,
      "previewPath": null,
      "fields": [
        {
          "title": "title",
          "name": "title",
          "type": "string"
        },
        {
          "title": "excerpt",
          "name": "excerpt",
          "type": "string"
        },
        {
          "title": "coverImage",
          "name": "coverImage",
          "type": "image",
          "isPreviewImage": true
        },
        {
          "title": "date",
          "name": "date",
          "type": "datetime"
        },
        {
          "title": "author",
          "name": "author",
          "type": "fields",
          "fields": [
            {
              "title": "name",
              "name": "name",
              "type": "string"
            },
            {
              "title": "picture",
              "name": "picture",
              "type": "image"
            }
          ]
        },
        {
          "title": "ogImage",
          "name": "ogImage",
          "type": "fields",
          "fields": [
            {
              "title": "url",
              "name": "url",
              "type": "image"
            }
          ]
        }
      ]
    }
  ]
}
When the configuration is completed, you can see the cover images being used on the content dashboard of Front Matter.
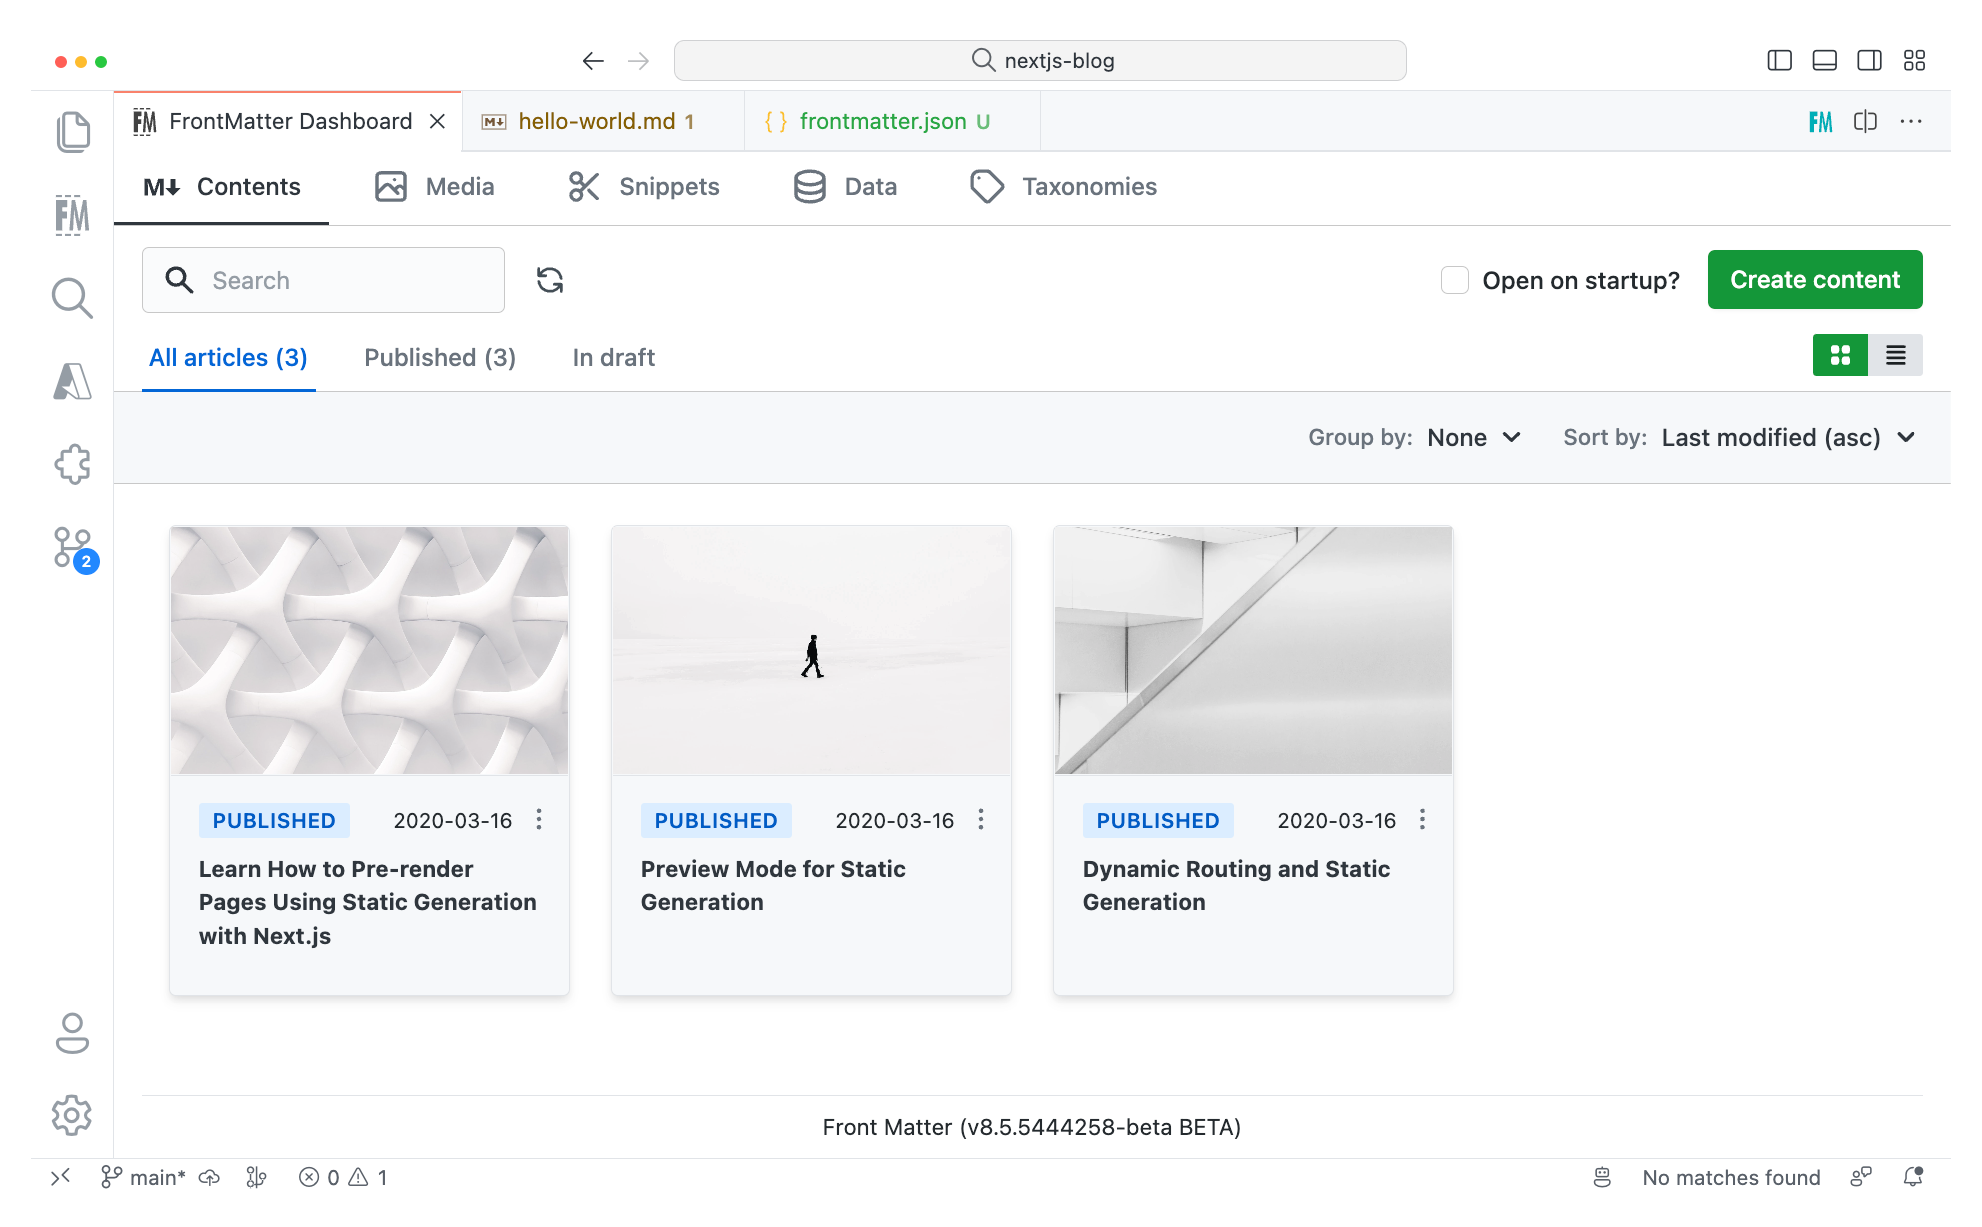
InfoIf the cover images are not showing up, you can try to clear the cache of Front Matter by running the
Front Matter: Clear cachecommand.
You are all set
You have successfully configured Front Matter CMS for your Next.js project. You can now start creating content and managing your website via Front Matter CMS.
Feedback/comments
Did you spot an issue in our documentation, or want to contribute? Edit this page on Github!